
Another month has been and gone here in South America and with lots of new experiences under our belts, it’s hard to imagine wanting to be anywhere else.
If you haven’t been following our travels, here’s a run-down on our route, key expenses and highlights of the last month or so…
You’ll find our previous months’ itinerary and costings here too.
Puerto Varas, Chile
With a few days to spare, we caught up on some work at our hostel and purchased the last few items we needed for Patagonia. Puerto Varas was a pretty little town but didn’t hold a torch to Bariloche or Pucon. With that said, Puerto Montt held even less appeal for us and really was just a place to visit a mall (to buy hiking poles) and to fly out of – pleasant enough but not somewhere we’d recommend staying.
Accommodation: 2 nights in a 5-bed dorm at Margouya Patagonia Outdoor @ CLP7,600 each/night (USD12/NZD17).
Onwards travel to Puerto Natales: Public bus from Puerto Varas to Puerto Montt and then taxi to the airport (a bus transfer is available but we ran out of time). Flight from Puerto Montt to Punta Arenas with Sky Airlines (CLP24,624 /USD39.43/NZD55.25 each) and then bus to Puerto Natales (CLP7,000/USD11.20/NZD15.70 each)
Puerto Natales, Chile
The jumping-off point for Torres del Paine, Puerto Natales is a quaint little town, buzzing about with hikers and adventure seekers. There’s not a lot to do in the township itself beyond stocking up with gear and visiting the few restaurants (Mesita Grande is a real winner for pizza and pasta) but it’s a nice place to relax in between hikes.
Accommodation: Whilst in town we stayed with ChileTour Patagonia in their guesthouse – this is only available to their trekking clients and includes home cooked meals – what a treat not having to cook!
Activities: Alongside our visit to the nearby Torres del Paine, we also went on a horse trek through the rugged Patagonian landscape – something we’d definitely recommend on a still day.
Onwards travel to Torres del Paine: Private transfer by ChileTour into the park.

Torres del Paine, Chilean Patagonia
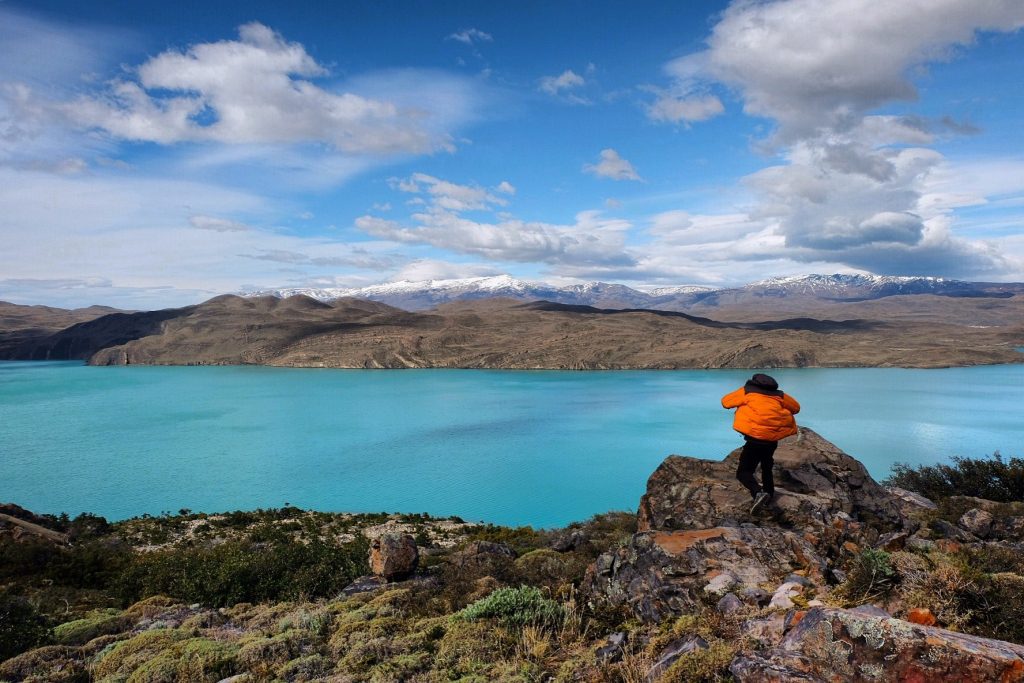
Our first South American bucket-list adventure, Torres del Paine was everything we hoped for and more! Though it was at times a challenge (aching muscles, sore feet and sub-zero temperatures) the hiking was one of the most rewarding things we’ve ever done in scenery that was, without doubt, the most gorgeous we’ve ever seen.
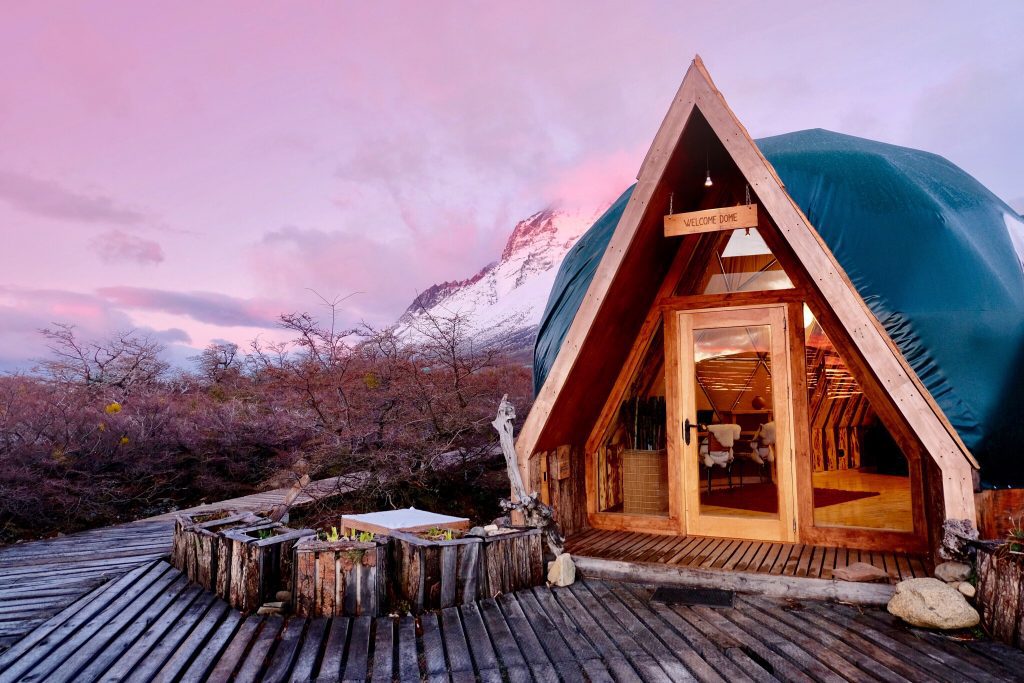
Accommodation: 1 night camping at Camp Italiano (free but be sure to reserve your spot), 1 night full-board in Refugio Paine Grande (organised by ChileTour Patagonia) and 3 nights at EcoCamp (pricing depends on the package selected)
Activities:
- Day 1 – Hike from Refugio Las Torres to Camp Italiano.
- Day 2 – Hike from Camp Italiano up the French Valley and on to Paine Grande.
- Day 3 – Boat and van transfer to EcoCamp
- Day 4 – Van tour of Torres del Paine and visit to Grey Glacier (navigation of boat if weather allows – we weren’t so lucky)
- Day 5 – The big finale – hike from EcoCamp to the Base of the Towers and back.
Onwards travel to El Calafate: Though EcoCamp can organise transfers directly to El Calafate, we returned to Puerto Natales in their van and then caught a shuttle and bus a few days later.


El Calafate, Argentian Patagonia
Home to one of the biggest glaciers in the world, we really went back and forth as to whether it was worth visiting El Calafate. In the end, we did and it was the best decision we could have made! Not only was the Perito Moreno glacier one of the most impressive natural sights we’ve ever witnessed but the township was abuzz with energy and a great little stop on the way north.
Accommodation: 1 night before visiting El Chalten and 1 following at America del Sur Hostel in a 6-bed dorm @ ARS185 each/night (USD10.60/NZD15).
Activites: A visit to the Perito Moreno glacier which cost ARS450 in return transport (through Cal Tur) and ARS500 for entrance into the park itself. Once you’re in, there are a variety of boardwalks that offer incredible views out over the monstrous glacier.
Though you can pay extra to ride a boat near the base of the glacier we decided against it (they don’t get particularly close due to the danger of icefall) and didn’t regret the decision – even the boardwalks are amazing!
Visitors are also able to walk on the glacier itself but be prepared, the ‘big walk’ will set you back big time at a whopping ARS6,200 each (USD356/NZD501.60). There is a smaller ‘minitrek’ available but it still costs ARS3,600 (USD206.70/NZD291.30) and according to reviews, really doesn’t include any time on the actual glacier.
Our friend Backpacking Becky did the larger of the two and said it was incredible but our budget just didn’t extend that far so we were left listening to her stories!
Onwards travel to El Chalten: Bus with Cal Tur ARS900 each (USD51.50/NZD72.90 – return included back to El Calafate)


El Chalten, Argentian Patagonia
Accommodation: 2 nights at Hostel Kaiken in a 4-bed dorm (which, fortunately, we had to ourselves throughout our stay – yes!) @ ARS243 each/night (USD13.95/NZD19.70).
Activites: Known for its amazing hikes, El Chalten differs from Puerto Natales/Torres del Paine in the sense that it’s located right at the base of the most famous tracks in the region.
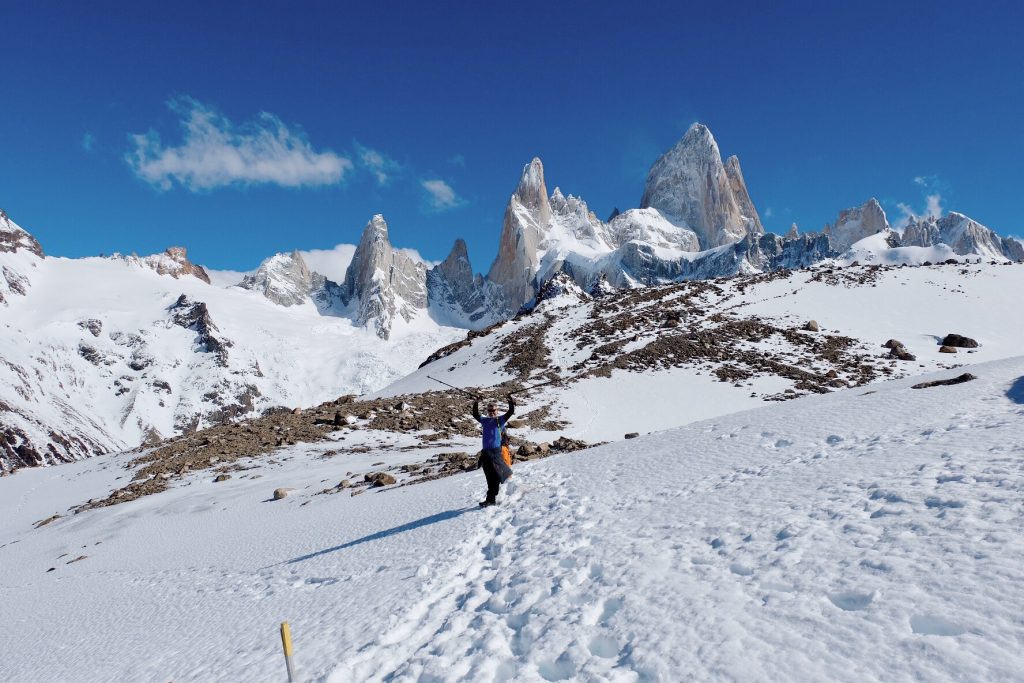
We took on Laguna de Los Tres, the most challenging one day hike in the region, which leads travellers to the base of the the Fitz Roy. It was a difficult hike through deep snow but was more than worthwhile. Though you are able to camp overnight should you choose, we completed the hike within a day as did everyone else we came across – our feet were sore and our bodies aching by the end of it, but it was definitely achievable as a day hike.
Should you have the time, the hike to Laguna Torre was also recommended to us but the feedback we received was that it was slightly easier and slightly less impressive – a great second day trek but not to be chosen over Laguna de Los Tres given the choice.
Onwards travel to Buenos Aires: Return bus journey with Cal Tur to El Calafate where we spent a night to break up the journey (see above) and then onwards to Puerto Natales the next morning. Then we caught another bus to Punta Arenas the following morning (@ CLP7,000 each – USD11/NZD15.60) before our flights with Sky Airlines (PUQ to SCL and SCL to EZE) @ ARS3,430 each (USD196.75/NZD278.10)

Buenos Aires, Argentina
Buenos Aires was a bit of a surprise for us. Though we expected to absolutely fall in love with Argentina’s capital, it just didn’t happen for us. For what felt like months we heard bloggers and fellow travellers rave about BA but when we left, we felt a little underwhelmed by the city if I’m being honest (and I always am!)
Though the city felt much safer than we half expected and we had some lovely days out, for the most part, we weren’t really inspired to explore.
What did you think of Buenos Aires? We’d love to hear your thoughts! If we had our time again, we’d definitely go in more planned, using a guide like this one: 3 days in Buenos Aires.
Top Tip: We found taxi drivers in Buenos Aires to be less honest than we’d hoped for. When leaving the airport (for a relatively short ride), three drivers in a row refused to put their meters on and attempted to charge us what we later realised was over three times the standard price! Instead of hailing a cab from the airport, we suggest you book ahead with a company like Kiwitaxi transfers in Argentina, so you can not only be assured of a safe ride, but you’re able to ensure a fair price is locked in before you set off.
Accommodation: 2 nights in a 4-bed dorm at America del Sur Hostel Buenos Aires @ ARS202.50 each/night (USD11.60/NZD16.40)
3 nights in a three-bed private room at Circus Hotel & Hostel @ ARS238.50 each/night (USD13.65/NZD19.30)
Activites: San Telmo Markets and lots of wandering around. Unfortunately, the rain put a stop to most of our plans but we were quite happy just to take it easy.
Onwards travel to Iguazu: Flight with Andes from AEP (Aeroparque Jorge Newbery) to IGR (Cataratas del Iguazú/Mayor Carlos Eduardo Krause Airport) @ ARS2115 each (USD121.25/NZD171.40)
Iguazu
Puerto Iguazu, Argentina
Puerto Iguazu, Argentina, services the most popular side of the Iguazu Falls. There you’ll find three main routes around the falls, each with significantly different views – all are worth checking out!
Accommodation: 2 nights at Casa Tres Fronteras in a private double room @ ARS209 each/night (USD12/NZD17)
Activites: ARS500 entrance to Iguazu Falls (Argentinian side) and ARS550 for the boat ride under the falls.
Onwards travel to Foz do Iguaçu: Public bus @ ARS25 each (USD1.45/NZD2)


Foz do Iguaçu, Brazil
Though we’d planned on accessing the Brazilian side of the Iguazu Falls (which apparently offer amazing views out over the entire falls area), we had such a great time on the Argentinian side that we spent the day relaxing and saved our pennies instead.
We’d also planned on walking over to Paraguay but didn’t quite make it – go figure. If only we’d read this food guide ahead of time, we’d have made a different decision!
Accommodation: 1 night at Casa Celia Wernke in a private double room @ BRL34.70 each (USD11/NZD15.50)
Onwards travel to Rio de Janeiro: Flights with Azul (IGU to VCP and VCP to SDU) @ BRL394 each (USD124.80, NZD176.45)
Rio de Janeiro, Brazil
With a little trepidation, we only booked three nights in Rio from the get-go. We couldn’t have been more wrong though! We absolutely fell in love with the city – vibrant, exciting and surprisingly safe (at least, so we found), we had an absolute blast.
Accommodation: 5 nights in a 6-bed dorm at Discovery Hostel @ BRL45 each/night (USD14.20/NZD20)
Activites:
- Ipanema – Head out for a surf or do as we did and watch the sunset from atop the rocks at the Copacabana end of the beach.
- Copacabana – An absolute icon, here an umbrella will only set you back BRL5 for a day and beach chairs BRL10 each, so get comfy and enjoy the beach. On the days we visited the waves were strongest on the left side of the beach so we’d suggest heading right towards Ipanema.
- Christ the Redeemer – For only BRL61 each, guests can catch official shuttle vans up to the top of this Wonder of the World and gain entry for as long as they wish. It’s currently not safe to walk to the summit so this really is the most reliable and safest way to see Christ the Redeemer up close. The views are amazing and it’s well worth the trip up.
- Museum of Tomorrow – Free of charge on Tuesdays this intriguing museum includes a great range of digital artefacts and manages to be both interesting and thought-provoking. This was a great way to spend a quiet morning in Rio.
- Lapa Steps – A perpetual favourite amongst tourists, the Lapa Steps are beautiful. Go hunting for a tile from your home country and see what you can spot. We found three from New Zealand!
- Parque das Ruínas – Beautiful views out over the city, an easy walk from the neighbourhood of Santa Teresa (and it’s free)
- National Historical Museum – Not quite as engaging as the Museum of Tomorrow, the National Historical Museum is still home to a range of interesting Brazilian artefacts. It wouldn’t be top of my list for a short stay but if you’re there for longer, it’s worth seeing.
- Olympic Mural – Vibrant art in what used to be one of the rundown parts of the city.
- Pedra da Gávea – A challenging but rewarding hike that includes a degree of free-climbing. It’s a full day-trip so be sure to equip yourself with everything you need – in particular, sturdy shoes and 3L of water per person.
Onwards travel to Ilha Grande: BRL95 each (USD30/NZD42.50) for private transfers with Easy Transfer, including hostel pick-up and delivery to ferry terminal (approx 2 hours) along with ferry ticket (approximately 45 minutes).


Lessons Learnt on the Road
- Travelling friends are the best. After an amazing stay at Chili Kiwi, we’ve met up with a number of newfound friends on the road, each to varying degrees. One thing remains the same though – it’s been so nice seeing familiar faces again and having others to travel with. We’ve just left Jess and Simon and are now on the road with Becky for around a month – good times!
- Supermarket service here is super slow! Having now spent the last two months in Chile, Argentina and Brazil, it’s fair to say that the supermarket service is the slowest we’ve ever experienced. It’s obviously not a major problem, just go with plenty of time to spare.
- Chile and Argentina have an accommodation tax that’s added onto each night of your stay but as a foreigner, you won’t have to pay it. Be sure to show your passport/PDI entrance paper to save 21% on all accommodation.
- Drones might not be worth the hassle here. We brought our Mavic with us in the hopes of snapping lots of amazing aerial clips but we’ve found the majority of places either aren’t worth flying or can’t be flown (due to local regulations and/or safety concerns). We knew we wouldn’t be able to put it up in Chilean Patagonia, for example, due to strict laws protecting the national park but hadn’t really accounted for the fact that although we could fly it in Rio, but would prefer not to in case someone decided they’d like to pinch a drone post-landing for themselves. It’s a fair bit of weight and money to be carrying around in our bags considering how little it’s being used.
So far South America really hasn’t been anything like we’d expected. The people, for the most part, are warm and understanding when it comes to our lack of Spanish, the streets feel relatively safe and the places we’ve visited so far have been incredibly diverse.
We’re so pleased we ventured over to this part of the world and can’t wait to see more!
What’s up next? More of Brazil, Bolivia, a quick trip back into Chile (to visit San Pedro where we’ll be using these helpful tips) and then on to Peru. Bring it on!
Check out our Recent Posts
Day One of the W Trek – Rain, Wind Gusts, Sub-Zero Camping & Lots of Smiles!
Patagonia by Horseback – The Perfect Alternative to Hiking
Day Two of the W Trek – Conquering the French Valley
The Base of the Towers – The Jewel in Torres Del Paine’s Crown
and one for fun…
Why You Should NEVER Eat a Kiwi…
Our Previous Months on the Road
A Month on the Road in South America – Chile and Argentina
Planning your own trip to South America? Pin this post to come back to it…


Some of the links above are affiliate links. By clicking through and booking your accommodation, we will receive a small payment at no extra charge to you. We appreciate your support!